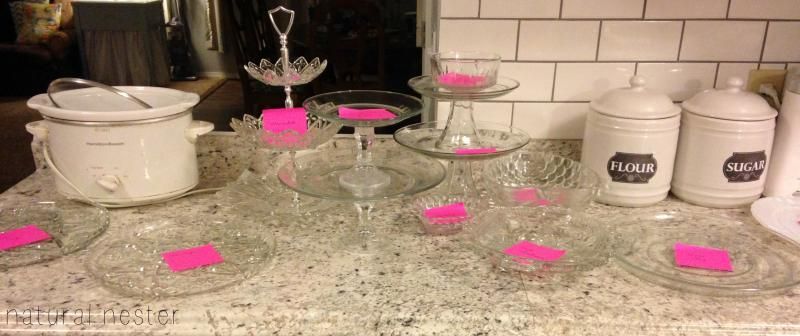
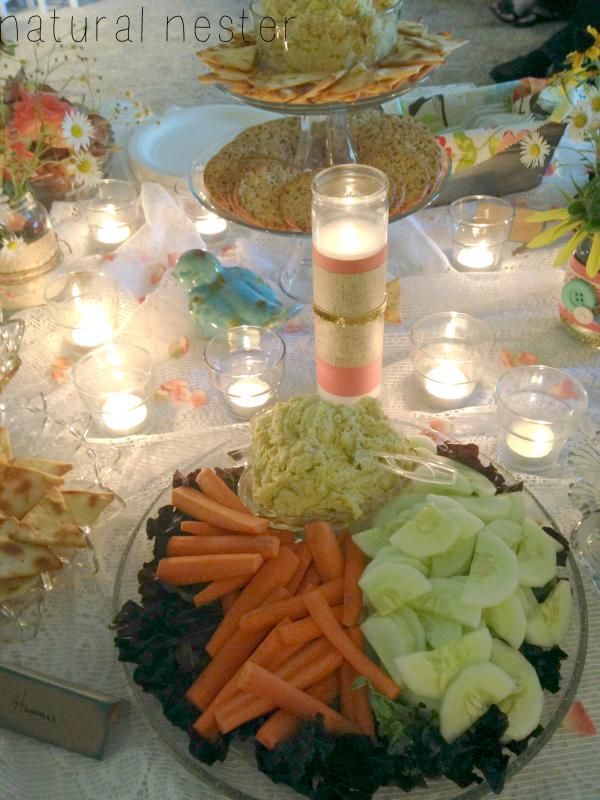
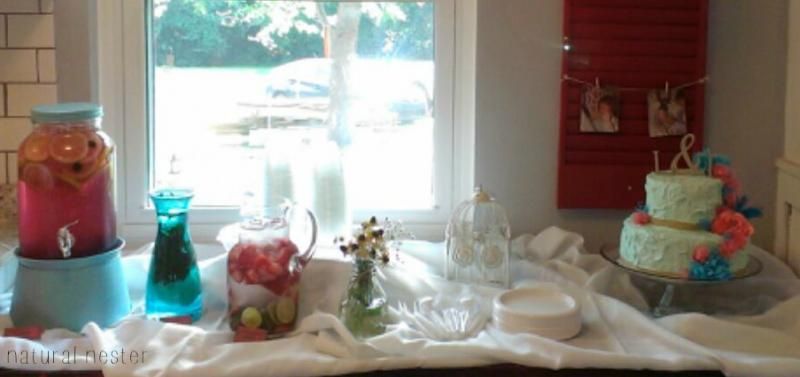
Thursday, March 29

Blog Announcement

I've been trying to figure out how to write this post for about 3 months now and I'd truly rather not.  But I didn't think it was fair to leave you hanging. I've decided to stop blogging.  I don't think this is a huge surprise since I've been MIA around here for awhile.  I've really been trying to prioritize the most important people and responsibilities in my life and Natural Nester didn't even make the Top 10, so I think it's time to say good-bye. 

I have plans to blog again (and am currently researching a different blogging platform, as well as blog designers), but it definitely won't be until the fall, maybe even later.  And the new blog will have more focused content on an area close to my heart. But until I'm ready to launch the new site, I'm taking the time to enjoy my family, my friends and this beautiful thing called life!

I want to thank those who have faithfully read and commented.  From the bottom of my heart, I appreciate every one of you who click over to see what projects, recipes and nonsense I've talked about.  You make the blog world a very friendly place! 

God bless every single one of you!

Photobucket

Monday, March 12

My Top 5 Baby Essentials

It seems that everytime I get on Facebook someone is announcing their pregnancy! So exciting!  At a 2am feeding for Miss Sophia, I thought it might be fun to write a post about my Top 5 Baby Essentials, the items that I think are must-haves for any new Momma.  And no, this isn't a sponsored post...these are just my Top 5 favorite things from having my two girls.

{via}
SwaddleMe Wraps
Most babies love to be swaddled...it makes them feel safe and secure.  The SwaddleMe wraps have been lifesavers for my sanity, as well as my husband's!  We never could get the hang of swaddling with those stiff flannel blankets like they do in the hospital, but these make swaddling easy, even in the middle of the night when you're cross-eyed from exhaustion.  Plus, they come in really cute patterns!

Rock 'n' Play Sleeper
{via}
We got the Rock 'n' Play Sleeper when Miss A was just a few weeks old and quickly fell in love with it!  It allows Baby to sleep at a 45-degree angle, perfect if your child suffers with reflux (like Miss A did).  Plus, it's easily folded up so you can take it with you to Grandma's house, church, or wherever!  I even strapped Miss A in it, brought her into the bathroom and she would nap while I showered...perfect for a nervous new Mommy who wanted to keep a close eye on my newborn, but wanted a hot shower, too!

Snap-Up or Zippered Sleepers
{via}
Miss Aleah hated to have anything go over her head (t-shirts, onesies, etc.) And Miss Sophia hates being cold. So for both of my girls, having a supply of sleepers has been fantastic!  I prefer the zippered ones because it takes less time to get them dressed, but the snap versions are great too.  And my favorites are from Carter's (found at Target and Babies 'R' Us.)  Until Miss S gets a little older, you can bet she'll be dressed in a sleeper 95% of the time...they're just too easy!


Wipes Warmer
Some Mommies might argue against having a wipes warmer, but I've found that it makes diaper changes go so much smoother, especially in the middle of the night. And they're great for wiping dirty faces and hands too, so it transitions well to toddlerhood!
You didn't seriously think I'd post a picture of
myself in a nursing bra, did you?
{via}

Nursing Sleep Bra and Nursing Pads
This is more for Momma than Baby, but these Wrap Nursing Sleep Bras from Motherhood Maternity are great! They're super comfy and if you pair them with Lansinoh Ultra Soft Disposable Nursing Pads (which really ARE ultra soft!), you'll wake up dry instead of drenched in milk. Don't ask me how I know.  ;)

Well, there you have it...my Top 5 Baby Essentials.  Truthfully, I really had to think hard to come up with 5. If you're a new Mom, trust me...you do NOT need all the stuff they try to sell  you!  Eventually Baby will require more stuff, but in the beginning all they really need is a safe place to sleep, clothes to keep them warm and your love.  Oh, and lots of "Mommy milk" as Miss A says. ;)

PS:  I'm planning to share more pics of our newest family member later in the week...but for today I needed an easy post! Those of you that have had a new baby in the house completely understand, I'm sure! :)

Photobucket

Sunday, March 4

She's Here!!!


After a fairly uneventful labor and an easy delivery (Thank You, Lord!!), Miss Sophia was born on Wednesday, February 29 at 7:12 am.  She weighed in at 6 lb. 11 oz. and was 21" long.  My water broke at 9:15 on Tuesday night and I knew then that I'd be giving birth to a Leap Day baby!  It's been a whirlwind few days, but we are loving every minute of having not one, but two gorgeous girls! We are so blessed and God has been so good to us throughout the entire pregnancy and delivery.  I cannot wait to see what He has in store for our family over the next year!


Photobucket

Wednesday, February 22

The Big Reveal: Baby's Nursery!

I've been working on the nursery for the new baby for a few months now, it's just taken me a long time to get it ready to show you!  This is a super long post, but I wanted to make sure I show you everything so stick with me!    

Come on in!  This is the view from the door.  (And for you worriers, relax!  She's sleeping in our room the first few weeks, then we'll remove the crib bumpers before putting her in the bed. Safety first!) The mobile is made from 5 paper lanterns and an embroidery hoop wrapped in fabric.  Super easy!  The bedding was a lucky yard sale find...it was brand new, never used and in the original package!  I loved the soothing colors!

I spent more than I originally planned on the curtains, but they're perfect in this room (plus, I saved everywhere else, so I figured it was ok to splurge a little!)  Sweet Hubby and I picked them out at Wal-Mart and they're thermal insulated so they block light and are supposed to help maintain the room temperature.  (That should help until we tackle replacing our super-old windows!)

The view from the closet: The glider was a yard sale find and is in fantastic shape.  My brother made the pallet bookshelf...isn't it fantastic?  I just need to pick out which books to put in there for snuggle time!

This is the $5 yard sale side table before Sweet Hubby attacked it with 2 cans of green spray paint.  It was a mess, but now it's lovely and perfect in the room! 


And the side table AFTER.  Much better!  It holds burp cloths and blankies, keeping necessities close to the chair where I'll nurse our sweet girl!  The shelves above (really are hanging straight...I promise!) hold my first pair of shoes and a swan music box gifted from Sweet Hubby's father, Grandpa Sam.


Close up of the Alphabet wall: I  found the free alphabet flash cards here, printed them on card stock and used a corner-rounder punch.  They're hung on yarn with tiny clothespins.


The view from behind the chair: the dresser was a Craigslist find and is the perfect height and size for a changing table.  Plus, it adds a TON of storage!  The only thing left to do is to hang some sort of curtain over the closet opening, but that's not really a top priority right now. :)  The hamper was a shower gift and after having Miss A, I know it'll get a lot of use!


A close up of each shelf: The small shelf above the hamper holds a bird house gifted from my dear friend that hosted my baby shower.  Isn't it adorable and perfect for the room?  The letter S is just a craft store chipboard letter wrapped in fabric to match the room. The mailbox holds a "letter" to Sophia from her Big Sister, Aleah.  :)


The shelf above the changing table: The Dumbo stuffed animal is the first gift we bought last summer when we found out we were pregnant. The mirrored piggy bank was a gift from Gammy and PopPop, the tiny snow globe was a shower gift from another dear friend and the Duck music box was a gift from Grandpa Sam.  The frame has a VERY simple printable I made in Photoshop that says "I am fearfully and wonderfully made." 


Hope you enjoyed the room tour! That was a lot of pictures for a pretty simple room, but I just love how it came out!  And when the overhead light is off and the little lamp is glowing, it's such a peaceful, soothing place to be.  I love just sitting in there to read or pray over this precious little one!

PS: I probably won't post again until our Little One arrives (hopefully this week!) so until next time, enjoy your week!

To see some amazing recipes, crafts, decor projects and more, check out these linky parties!
Photobucket


Monday, February 13

Coffee Filter Wreath

I promised pics of the new pantry door wreath and here it is! It's a coffee filter wreath (which I first saw at The Nester.) I know these have been around forever, but  I wanted to make a wreath using stuff I already in the house and this fit the bill!  Right now it's hanging by a strip of fabric, but I plan to pick up some much wider black-and-white polka dot ribbon at Hobby Lobby to use (and bonus...this week it's 50% off!)

I used a 10" Styrofoam wreath form, white coffee filters and some florist pins (all from my craft stash!) Total cost was probably less than $5.  I used about 250 coffee filters folded into quarters, if you want to make your own.  After about an hour of pinning while watching Miss A's favorite movie with her (Monsters Inc.) I had a huge, fluffy, ruffly wreath to add to the pantry door!


Photobucket

Thursday, February 9

Kitchen Nest Fluffing: EAT Sign


Call it pregnancy nesting or simply wanting a new look for the new year, but I've been doing some nest fluffing around the Natural Nester house!

This week, using scrapbook paper and chipboard letters I created a fun little detail to hang above the pantry door.  The new wreath for this door is almost finished and I'll share it next week!  I also moved the dry erase menu board I made out of the pantry and put it where we can see it everyday.  It's helping me stay on track, believe it or not!  

These are just a few small changes going on in the kitchen, but so far they're making me smile and I love it!

Check out more fun ideas at:
The Weekend Show Off Party

Photobucket

Wednesday, February 8

5-Minute Craft: Recycled Soap Dispenser

I almost hesitate to call this a craft because it's so easy!  I wanted something cute to hold the dish soap next to the kitchen sink and had tried a few different options, but nothing really worked.  When I finally emptied my shampoo bottle, I decided to recycle it into a dish soap container. 

The shampoo label came off easily, I washed it out and attached a cute new label made from scrapbook paper leftover from a project I'm showing you on Thursday (see it HERE!)  I attached the label with a piece of clear contact paper and it was ready to fill....or at least add some soap until I get to the store for another bottle!

This is probably the easiest project I've done in quite awhile...and the bonus is that it cost me nothing because it was all completely recycled!

More fun ideas can be found here:
The Weekend Show Off Party

Photobucket

Monday, February 6

Comfort in a Bowl: Risotto

Tonight's dinner was one of my all-time favorites:  Summer Squash, Zucchini and Pea Risotto.  I originally found the recipe over at Debbi Does Dinner.  To make it easy on you, I'm reposting the recipe here, but if you try it and like it, please stop over and let Debbi know...I'm sure she'd appreciate the bloggy love!  This is a great meal for Meatless Monday or you can serve it alongside roasted chicken and a fresh salad.  Yum!!!

Summer Squash, Zucchini & Pea Risotto

1 Tbsp. olive oil
1 medium onion
1 medium zucchini, cut lengthwise and then in 1/4" thick slices*
1 medium summer squash, cut lengthwise and then 1/2" thick slices*
1 quart of chicken stock (or vegetable stock, if you prefer)
2 Tbsp. butter
1 cup arborio rice
1 cup peas (I use frozen)
1 lemon, juiced
Salt and Pepper to taste
Parmesan cheese, grated

In a saucepan, heat olive oil and saute the squashes for 2-3 minutes. Remove from heat and set aside.  In a larger saucepan, melt butter and add onions.  Saute until translucent, about 3-4 minutes; add rice and stir to coat with onions and butter.  Add 1/2 cup stock and stir until liquid is absorbed.  Continue adding 1 cup of stock at a time, stirring frequently to keep from sticking; this will take about 5-7 minutes per cup of stock. 

After you've added all your stock, the risotto should be creamy and the rice should be tender (but not mushy!) Add the squashes and peas and stir, cooking for a few minutes until heated through.  Remove from heat and stir in the lemon juice (don't leave this out...it makes the flavors so bright and delicious!)  Add salt and pepper, if desired.  (I like to top mine with grated parmesan, so I leave out the salt.)

*Obviously, my squashes aren't cut up this way.  I cut mine in 1/2" chunks and froze them when I got a bunch at the farmer's market in the fall.  I steamed them in the microwave, then added them to the risotto after it cooked.  It tasted just as great as using fresh squash!

Buon appetito!

Photobucket

Wednesday, February 1

Rainbow Birthday Shirt

I made Miss A a special birthday shirt to wear for her party last Saturday. I followed Crystal's tutorial at Little Bit Funky.  I love how it came out, but the icing on the cake was when I showed it to Miss A.  Her face lit up and she said, "Oh Mama, pwetty!"  Made. My. Week.  :)  Here she is, wearing it at her party...love that adorable ruffle skirt, too!  (It was a birthday gift from one of her favorite Aunties!)

And here she is wearing it today...see how the edges frayed in the wash?  I love that vintage appeal!  The cloud is just a scrap of a gray fleece blanket...I love how Crystal used white chenille, but I wanted to use a white t-shirt and it wouldn't have shown up.  Plan B turned out pretty good anyway though, right?

So tell me...do you like to craft for the littles in your life?  What's the most recent thing you've made for a munchkin?

Photobucket

Monday, January 30

Rainbow Birthday Party!

We celebrated Miss A's 2nd Birthday this weekend and it was so much fun!  Not only did I have a ton of fun planning it, but it was an absolute joy to watch her interact with all of our sweet friends and family! 

The party table was so colorful and fun!  A polka dot sheet acted as the tablecloth and more colorful fabric was bunched around the cupcake tiers, cake and punch bowl.  Utensils were placed in little metal pails from the Target $1 spot and balloons (one of Miss A's favorite things!) added some fun.

The food was a simple affair.  Cake and ice cream, a vegetable platter, Rainbow goldfish (of course!) and a bowl of tropical Skittles and Starburst...lots of sugar! But you only have one birthday a year, so why not?  I served Creamy Reception Punch (recipe below) and Iced Water with Lemon.

The sweet little pennant banner was designed to match the invitations.  The amazing Carlee at Ladybird Ln. designed the printables and I'll be sharing detail shots of those tomorrow.  And if you guessed that this is a rainbow cake, you're right!!  Unfortunately, I was too busy serving ice cream to get a good shot of it being cut, but I know our photographer did...I'll share his shots later.  Mom and I used Wilton gel colors: Rose, Orange, Lemon Yellow, Leaf Green, Sky Blue and Violet.  

Now, do you want the recipe for the fantastic punch we served?  This recipe has been in our family for years and I love it!

Creamy Reception Punch
2 quarts vanilla ice cream
4 cups orange juice
1/2 cup lemon juice
56 oz. Sprite
10 oz. jar maraschino cherries, undrained

Chill juices and Sprite until you're ready to make your punch.  Spoon vanilla ice cream by tablespoons into a large punch bowl.  Add juices, stirring to muddle the ice cream.  Slowly pour Sprite into bowl and stir gently to mix.  Add cherries and stir to mix.

Tomorrow I'll share the invitation designed by Carlee and the cute t-shirt I made for Miss A to wear at the party!

I'm linking up this week!  Join me at these fun parties for more crafty inspiration!


Photobucket

Monday, January 23

Happy Hearts!

I've been doing a little bit of nesting around here and added a few more sweet details for Valentine's Day!  This window is on the first wall you see when you come in our front door and I love having a wreath there!  It's just a straw wreath, wrapped in unbleached muslin and yarn.  I added wooden hearts and a small pompom garland and called her done!  I decoupaged the hearts with scrapbook paper and have had them in my craft closet, waiting for the perfect project for a few years now...they were perfect for my little wreath!


Next up was adding a little pennant banner to the old shutters hanging on our living room wall.  I had some leftover wooden hearts so I added them to this pennant banner I made awhile back.  I think it adds the perfect touch to my shutters, don't you?  You can click for a close-up, but the fabrics used on the banner are blue/white gingham, red/white gingham and a tiny floral pattern.


You can see my original post about the Valentine "mantel" here...there are better photos of the shelf details and that ca-yute pompom garland.

The Valentine wall arrangement

That's all for today...this will be a crazy week while I get ready for Miss A's 2nd birthday party on Saturday!  Next week I promise to share photos of the party, the cake and all the precious details going into her special day!  You won't want to miss it...there may even be 6 different shades of food coloring going into her cake!  :)

I'm linking up my little Valentine crafts to these fun parties:
Turquoise Lovin' Party
Get Your Craft On

Photobucket

Wednesday, January 18

Time Off

Just dropping in to let you know that I'll be away from the blog until at least Friday.  Our heater in our house went out and while we wait for the part to come in and the service people to come fix it, we're away from home, trying to stay warm at Gammy and PopPop's house!   Enjoy your wintery week!

Photobucket

Friday, January 13

Colored Rice: Miss A's Reaction

Yesterday I showed you how I made colored rice for a sensory bin activity.  If you remember, I made 6 different colors and set it up like this.  I striped the rice (about 1/2 cup of each color) in a plastic lid (from an aluminum 9x13 disposable pan) and set out 3 measuring cups, a tablespoon and a large scoop.  Later into the activity, I also gave her 2 small plastic bowls, a small water pitcher and a cardboard tube to use.

To say this activity was a huge hit with Miss A would be a complete understatement!  She LOVED this activity!!!  I set the table up at 9:55 and started cleaning it up at 11:05.  She played with it for over an hour!  I've never seen an activity keep her engaged for that long. 

One of her favorite things to do was use a small water pitcher (not pictured) to fill a cardboard tube, then lift the tube so the rice spilled out into the tray.  At the very end she asked me to put the tray on the floor where she put her feet in it and played that way for a few minutes.

Was this messy?  You bet!  But that's why I do these types of activities by our kitchen.  Sweeping rice up from the laminate floor was an easy clean up and I ended up only having to throw away about 1/2 cup of rice.  What remained in the tray and on the table was put into a ziploc bag for future use.  Plus, I still have 1-1/2 cups of each individual color for mixing later!


Photobucket

Thursday, January 12

Toddler Activity: Colored Rice

A few weeks ago, I took about 30 minutes and made colored rice for Miss A to play with as a sensory bin activity.  If you haven't made it before, it is so easy!  I used the recipe found at {Share and Remember} (discovered via Pinterest, of course!) and liquid food colors my Mom had in her cake decorating supplies.  Her colors are super-concentrated and I ended up with really bright, vibrant colored rice!  And brightly colored hands, when the red exploded on me!  (Note to self:  Wear gloves next time!)

I plan to make this again, but next time I'll use gel colors and water, omitting the alcohol. The smell was pretty strong for a few hours, though it dissipated completely and the rice does not smell like alcohol now.  I have since read on other sites that the alcohol isn't really necessary; you can use water, but it just takes a bit longer to dry. 

I used 2 cups of rice for each color (a  5 lb. package) and made 6 colors total:  Red, Orange, Yellow, Green, Blue and Purple.  The orange and red were very close to the same shade though.  

I got it out today for Miss A to play with for the first time.  This is how I set it up...come back tomorrow to see her reaction and how this new activity went over!


Photobucket